想了解更多技术分享请搜索“技术”标签,本人水平有限,内容可能不严谨或存在错误,如有发现错误请在评论区处留言,欢迎批评指正。
一、前言
1.为什么美化Powershell
虽然本人对win下的命令行终端不常用,也就拿来开ai agent 或者 给WSL映射一下端口。但是鲁迅曾经说过,好看是一辈子的事情()。美化一下命令行窗口是能让人心情舒畅滴。
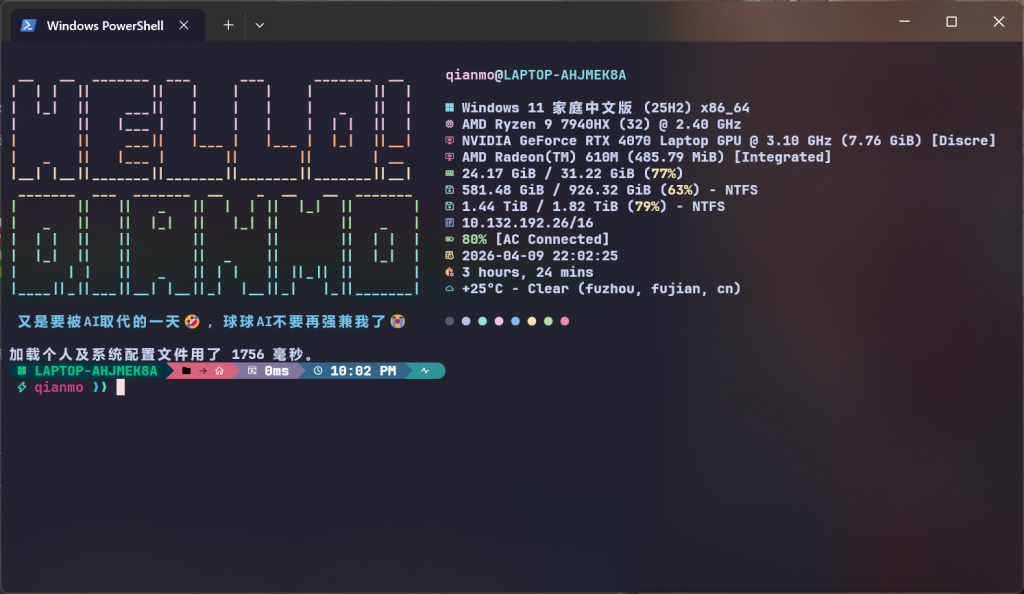
先不多说别的,先直接展示一下效果。
2.关于Powershell美化优化内容
Powershell美化和优化包含的主要内容:Powershell、fastfetch、Oh My Posh、PSCompletions等
二、过程
1.fastfetch美化
可以参考一下这个视频【熟肉】你的windows终端丑爆了! Your Terminal is Boring… Fix It_哔哩哔哩_bilibili
简介内容(点我)
https://www.youtube.com/watch?v=z3NpVq-y6jU
🎥 About This Video
In this video, I’ll show you how to:
👉 Transform your boring black Windows Terminal into a modern, customized setup
👉 Install and configure JetBrains Mono Nerd Font & Catppuccin Mocha theme for your terminal
👉 Set up Fastfetch in Windows Terminal to display system stats with clean, aesthetic styling

If you’re into coding, ricing, or just want your Windows Terminal customization to look clean and professional, this tutorial is for you. 🚀

⏱️ Timestamps
00:00 – Intro
00:27 – Requirements
00:37 – Step 1
01:18 – Powershell profile creation
01:53 – Step 2
02:24 – Step 3
03:09 – Step 4
03:29 – TADA!!! ヾ(≧▽≦*)o
04:01 – Outr

🔗 Links & Resources
My dot files: https://github.com/SleepyCatHey/Ultimate-Win11-Setup
Fastfetch: https://github.com/fastfetch-cli/fastfetch

📜To create a profile in Powershell,
New-Item -Path $profile.CurrentUserAllHosts -Type File -Force

⚠️ If you get "execution of scripts is disabled on this system" then do this 👇
Run the following command in an elevated PowerShell session (Run as Administrator):
Set-ExecutionPolicy -ExecutionPolicy RemoteSigned -Scope CurrentUser -Force

👤 About Me
Hey! I’m Sami — a designer, developer, and tech enthusiast. On this channel, I share quick and practical tutorials on Windows customization, productivity tools, web design, and dev tips.

✨ My goal: keep things simple, fun, and useful so you don’t waste time.

📌 Subscribe if you love:
Windows tips
Design hacks
Dev tools
Productivity tricks

📲 Follow Me Everywhere
All my links in one place → https://linktr.ee/SleepyCatHey

#️⃣ Tags
#terminal #windows #customization #programming #developers #powershell #fastfetch #aesthetic #setup #dotfiles
按照视频步骤到最后你将会得到(显示的ASCII图形会不一样,因为原作者改了)
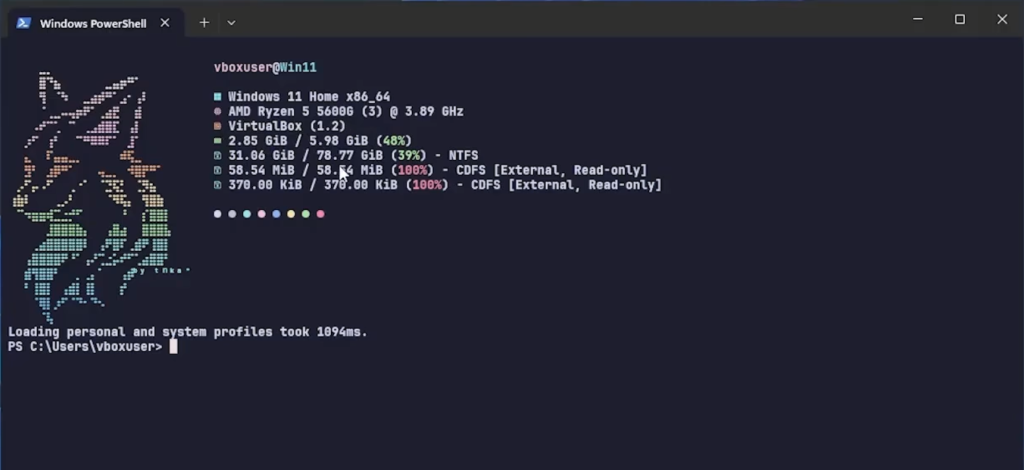
恭喜你完成最重要的一步了!
但是对于我来说还不够,想更个性化一点,接下来对于ASCII这一块的自定义。

参考我对”C:\Users\%user_name%.config\fastfetch\ascii.txt”进行的修改
$2 __   __  _______  ___      ___      _______  __
$2|  | |  ||       ||   |    |   |    |       ||  |
$3|  |_|  ||    ___||   |    |   |    |   _   ||  |
$3|       ||   |___ |   |    |   |    |  | |  ||  |
$4|       ||    ___||   |___ |   |___ |  |_|  ||__|
$4|   _   ||   |___ |       ||       ||       | __
$5|__| |__||_______||_______||_______||_______||__|
$5 _______  ___  _______  __    _  __   __  _______
$6|       ||   ||   _   ||  |  | ||  |_|  ||       |
$6|   _   ||   ||  |_|  ||   |_| ||       ||   _   |
$7|  | |  ||   ||       ||       ||       ||  | |  |
$7|  |_|  ||   ||       ||  _    ||       ||  |_|  |
$8|      | |   ||   _   || | |   || ||_|| ||       |
$8|____||_||___||__| |__||_|  |__||_|   |_||_______|

$9 又是要被AI取代的一天🤣 ,球球AI不要再强兼我了😭
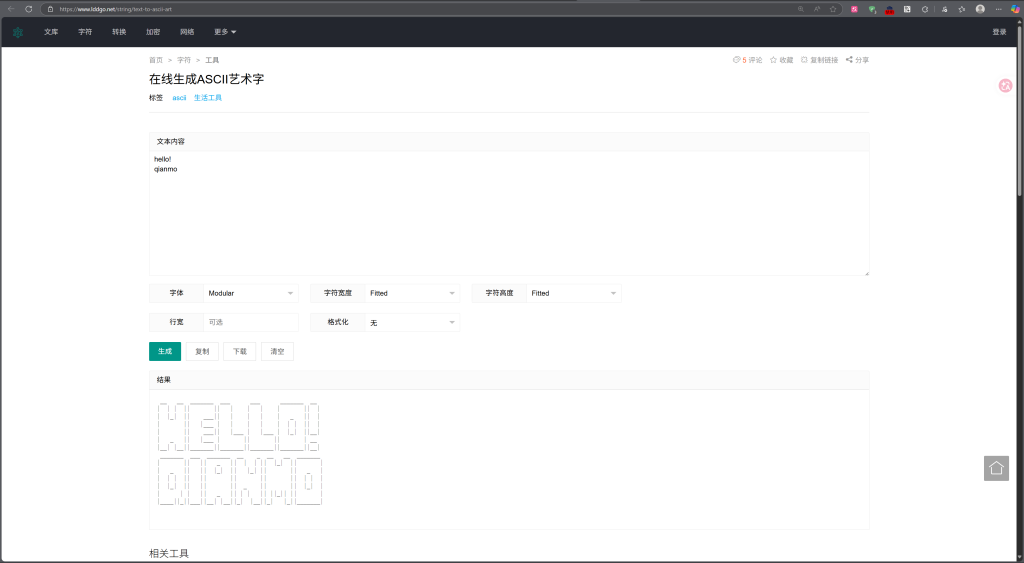
推荐一下ASCII绘画网站 在线生成ASCII艺术字
接下来优化右边信息栏自定义

修改”C:\Users\%user_name%.config\fastfetch\config.jsonc”
我的修改(点我)
{
"$schema": "https://github.com/fastfetch-cli/fastfetch/raw/dev/doc/json_schema.json",
"logo": {
"type": "file",
"source": "C:/Users/qianmo/.config/fastfetch/ascii.txt",
"color": {
"1": "#F5E0DC",
"2": "#F2CDCD",
"3": "#F5C2E7",
"4": "#FAB387",
"5": "#F9E2AF",
"6": "#A6E3A1",
"7": "#94E2D5",
"8": "#89DCEB",
"9": "#74C7EC"
},
"padding": {
"top": 1,
"right": 3
}
},
"display": {
"separator": " "
},
"modules": [
"break",
{
"type": "title",
"color": {
"user": "#F5C2E7",
"at": "#CDD6F4",
"host": "#89DCEB"
}
},
"break",
{
"type": "os",
"key": "",
"keyColor": "#89DCEB"
},
{
"type": "cpu",
"key": "",
"keyColor": "#F5C2E7"
},
{
"type": "gpu",
"key": "",
"keyColor": "#F38BA8"
},
{
"type": "memory",
"key": "",
"keyColor": "#A6E3A1",
"format": "{used} / {total} ({percentage})"
},
{
"type": "disk",
"key": "",
"keyColor": "#94E2D5"
},
{
"type": "localip",
"key": "",
"keyColor": "#89B4FA"
},
{
"type": "battery",
"key": "",
"keyColor": "#A6E3A1"
},
{
"type": "datetime",
"key": "",
"keyColor": "#F9E2AF"
},
{
"type": "uptime",
"key": "",
"keyColor": "#FAB387"
},
{
"type": "weather",
"key": "",
"keyColor": "#89DCEB"
},
"break",
{
"type": "colors",
"symbol": "circle"
}
]
}
相关说明(点我)
  Fastfetch 的配置是通过 "modules" 数组来定义显示的信息。每个模块都有一个 "type" 字段,指定要显示的信息类型。

  用户当前的模块包括:
  - break: 空行
  - title: 用户名@主机名
  - os: 操作系统信息
  - cpu: CPU 信息
  - board: 主板信息
  - memory: 内存信息
  - disk: 磁盘信息
  - colors: 颜色块

  用户可以添加更多模块类型,比如:
  - gpu: GPU 信息
  - battery: 电池信息
  - network: 网络信息
  - packages: 软件包数量
  - shell: Shell 信息
  - terminal: 终端信息
  - uptime: 系统运行时间
  - resolution: 屏幕分辨率
  - locale: 区域设置
  - localip: 本地 IP 地址
  - weather: 天气信息
  等等

  我需要告诉用户如何添加更多模块,以及可用的模块类型列表。

● 找到了你的 Fastfetch 配置文件。右侧显示的信息是通过 modules 数组定义的。

  如何添加更多信息

  在 config.jsonc 的 modules 数组中添加新模块即可。以下是可用的常用模块类型:(ps:有些用不了)

  ┌────────────┬──────────────┬───────────────┐
  │  模块类型  │   显示内容   │ 示例 key 图标 │
  ├────────────┼──────────────┼───────────────┤
  │ gpu        │ 显卡信息     │ `             │
  ├────────────┼──────────────┼───────────────┤
  │ battery    │ 电池状态     │ `             │
  ├────────────┼──────────────┼───────────────┤
  │ network    │ 网络信息     │ `             │
  ├────────────┼──────────────┼───────────────┤
  │ localip    │ 本地 IP 地址 │ `             │
  ├────────────┼──────────────┼───────────────┤
  │ uptime     │ 系统运行时间 │ `             │
  ├────────────┼──────────────┼───────────────┤
  │ shell      │ Shell 信息   │ `             │
  ├────────────┼──────────────┼───────────────┤
  │ terminal   │ 终端信息     │ `             │
  ├────────────┼──────────────┼───────────────┤
  │ packages   │ 软件包数量   │ `             │
  ├────────────┼──────────────┼───────────────┤
  │ resolution │ 屏幕分辨率   │ `             │
  ├────────────┼──────────────┼───────────────┤
  │ locale     │ 区域设置     │ `             │
  ├────────────┼──────────────┼───────────────┤
  │ weather    │ 天气信息     │ `             │
  ├────────────┼──────────────┼───────────────┤
  │ wm         │ 窗口管理器   │ `             │
  ├────────────┼──────────────┼───────────────┤
  │ de         │ 桌面环境     │ `             │
  ├────────────┼──────────────┼───────────────┤
  │ media      │ 当前播放媒体 │ `             │
  ├────────────┼──────────────┼───────────────┤
  │ datetime   │ 日期时间     │ `             │
  └────────────┴──────────────┴───────────────┘

  示例:添加 GPU、运行时间和本地 IP

  {
    "type": "gpu",
    "key": "",
    "keyColor": "#F38BA8"
  }
推荐图标网站 Nerd Fonts – Iconic font aggregator, glyphs/icons collection, & fonts patcher
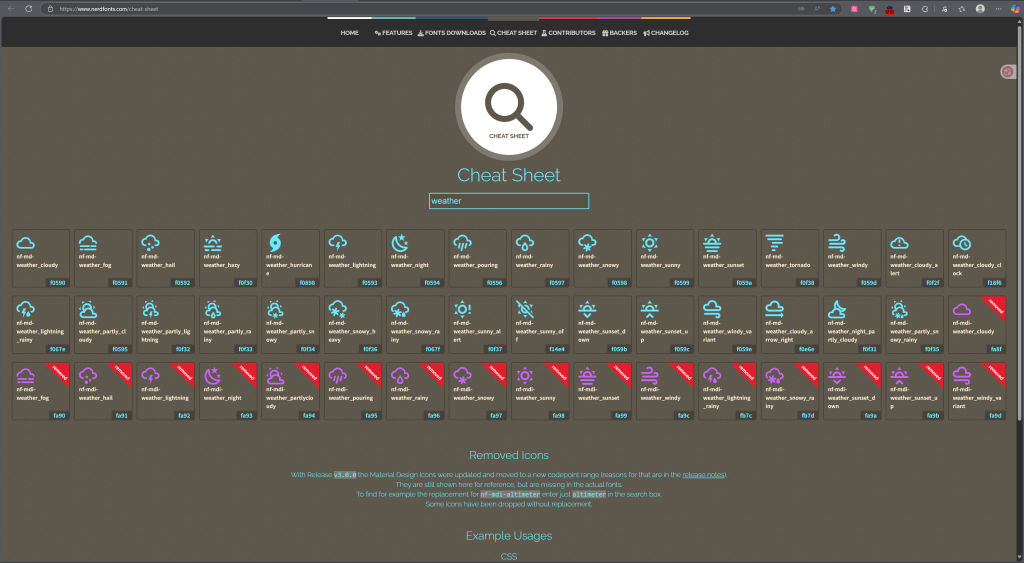
复制Icon码到“key”位置就能修改图标了
2.美化Oh My Posh
接下来美化这部分,使用的是Oh My Posh。

Oh My Posh我之前就有装过,我忘了之前看的是什么视频,可以参考这个视频【教程】终端美化 Windows Terminal+oh-my-posh美化_哔哩哔哩_bilibili
我使用的主题是montys,可以通过 Themes | Oh My Posh 这个网站预览一下自己喜欢的主题,如何切换主题上述安装视频里面有讲解,不再赘述,出现其他问题多问问AI。

3.优化PSCompletions
这个是一个功能很强大的代码补全插件,补全界面也很好看还支持自定义,不过有些设置需要新版Powershell。PSCompletions:一个开源的 PowerShell 命令补全模块,提升你的命令补全体验_哔哩哔哩_bilibili
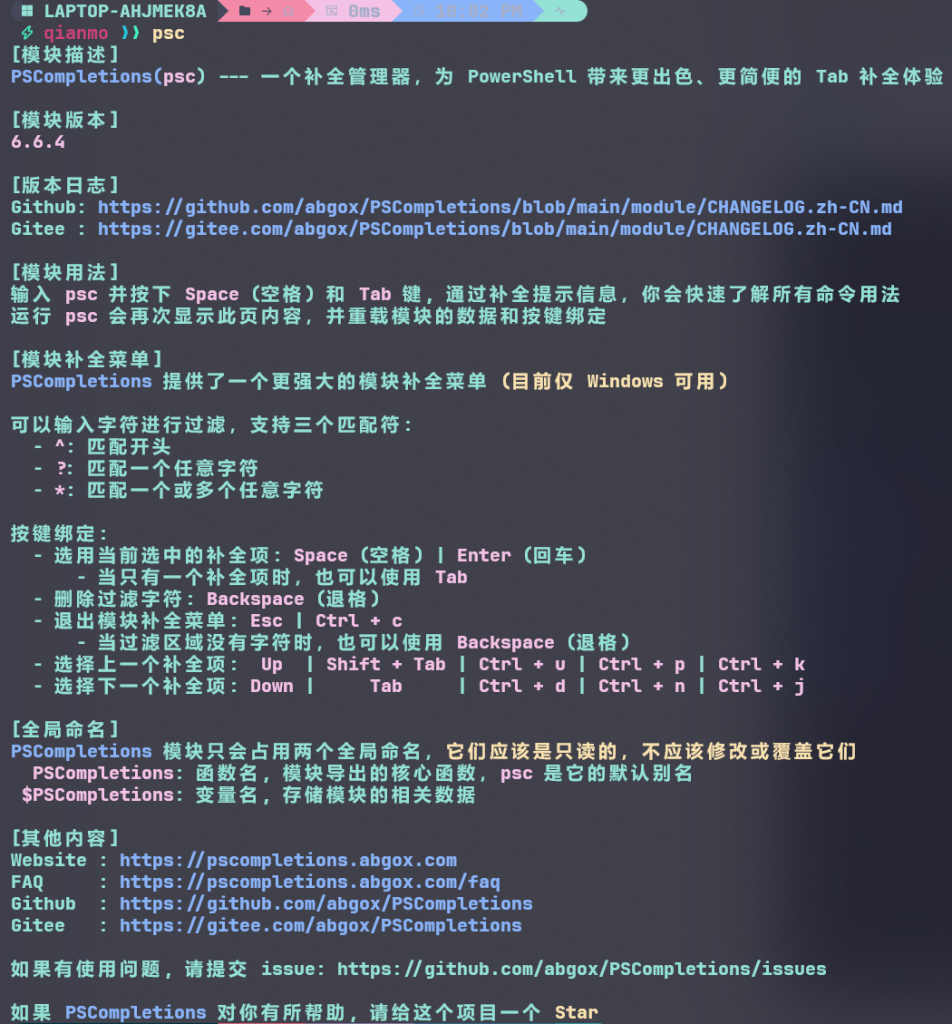
同时也支持添加补全包,可以拿来补全git指令,作者持续在维护项目,更新内容,很推荐尝试一下🙂。